How to Use Different Mini Excavator Attachments Effectively
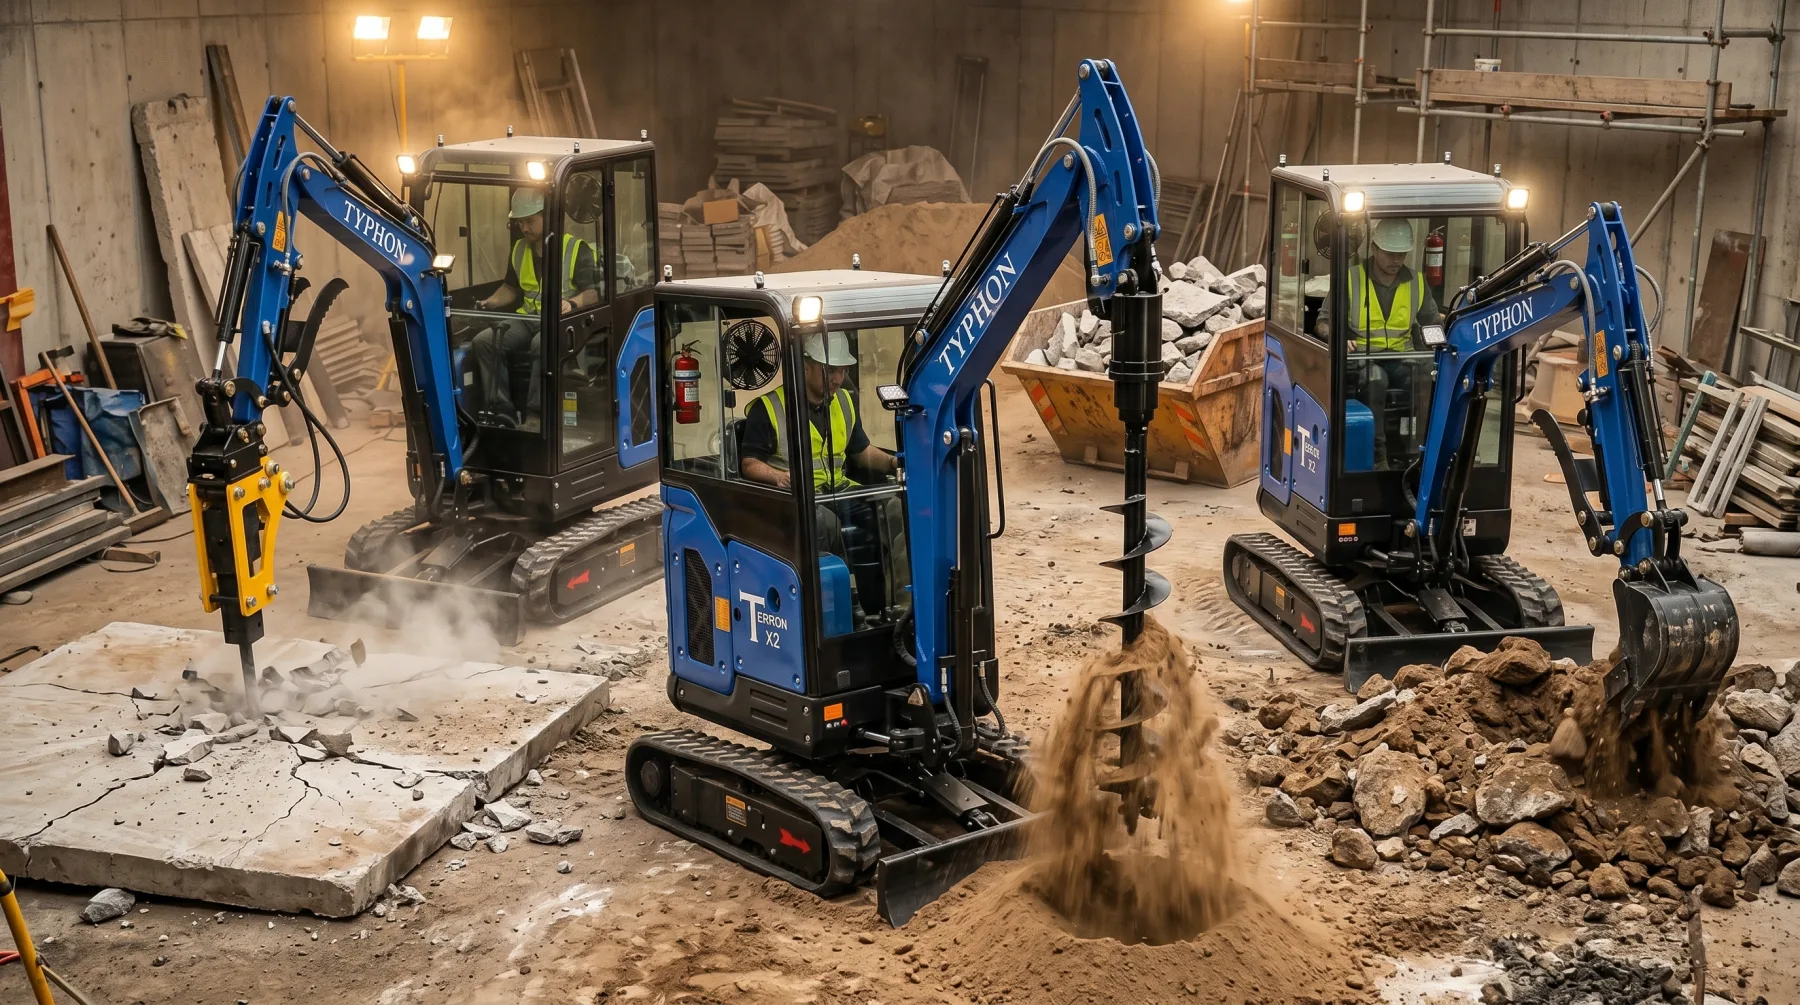
Having a mini excavator is like having many different products working at the same time. It is capable of doing various tasks with different attachments on the end of its arm. The exact same machine that digs a clean trench in the morning can break up concrete, drill perfect fence holes, or clear a massive debris pile by the afternoon, as long as you pair it with the right tool. Choosing the correct attachment saves hours of hard labor, protects your machine from unnecessary wear, and helps your business finish more jobs using a single piece of equipment.
This practical guide walks through five of the most useful mini excavator attachments and explains exactly how to get the best results from each on your job site. You will learn what every attachment does, when to reach for it, and the simple operational tips that separate highly efficient operators from frustrated ones.
Understanding how to properly utilize your machine's auxiliary hydraulics and quick-couple systems transforms your mini excavator from a simple digging tool into a multi-purpose powerhouse. Whether you are a contractor looking to maximize profit margins or a property owner tackling a major land clearing project, mastering these attachments is the single best way to unlock the true potential of your equipment investment.
Why the Right Attachment Matters
Using the wrong attachment is one of the fastest ways to waste time and wear out your equipment. A standard bucket cannot break solid rock, and a hydraulic breaker cannot stack a log pile. When you force a tool to do a job it was never built for, you risk slow progress, damaged auxiliary hydraulics, and unnecessary strain on your operator.
The smarter approach is to treat your mini excavator as a highly versatile power platform. By investing in a small set of quality attachments, a single machine easily covers digging, demolition, drilling, material handling, and site preparation. That adaptability is exactly what protects your profit margins, reduces your reliance on costly rentals, and makes a mini excavator such a sound investment for any growing business.
Excavator Bucket: Digging and Trenching
The bucket is the core workhorse of any mini excavator. It handles everything from digging foundations and cutting utility trenches to general earthmoving and controlled soil removal. For nearly every project, the bucket is the essential tool where the work begins.
You should reach for a bucket whenever you need to move dirt. A narrow trenching bucket is ideal for cutting tight lines for water and power utilities, while a wide bucket moves more material per pass, making it perfect for backfilling and grading.
To maximize your digging efficiency and protect your equipment, keep these practical operator tips in mind:
- Match Width to the Job: Use narrow profiles for deep trenching to avoid moving excess dirt, and wide profiles for bulk earthmoving or leveling.
- Curl Smoothly: Let the machine do the work by curling the bucket cleanly rather than forcing the arm, which protects your hydraulics and creates cleaner trench walls.
- Maintain Sharp Teeth: Worn, blunt teeth slow down your digging speed and burn excess fuel. Replace them before they round off completely.
- Dig in Layers: Take manageable, layered bites instead of trying to overload the bucket in a single pass, especially when working in dense or clay-heavy soil.
Ultimately, choosing the right bucket and using smooth, layered cuts keeps your project moving quickly. Taking care of your bucket teeth ensures the excavator slices through tough ground without wasting fuel or straining the machine.
Auger Drill: Fencing and Post Hole Digging
When you hit stubborn material that a standard bucket cannot budge, the hydraulic breaker takes over. Built specifically for heavy demolition, this attachment delivers powerful, repeated impact force to shatter concrete, asphalt, and solid rock. It easily turns slow, back-breaking labor into quick, efficient machine work. You should choose a breaker for demolishing old concrete slabs, tearing up driveways, splitting large boulders, or cutting through hard ground before you dig. Anywhere a manual jackhammer crew would spend hours sweating, a mini excavator breaker finishes the job in a fraction of the time.
To get the cleanest breaks and protect your attachment from unnecessary wear, follow these smart operational habits:
- Position Firmly Before Striking: Place the tool point firmly against the material at a perpendicular angle before applying hydraulic power, rather than hammering at a sloppy slant.
- Avoid Blank Firing: Stop hammering the moment the material breaks through, as striking empty air sends destructive shockwaves back into the breaker.
- Work from the Edges Inward: Break large concrete slabs starting from an outer edge in manageable pieces instead of attacking the solid center first.
- Limit Continuous Run Time: Keep your hammer bursts short—around 15 to 30 seconds per spot—to prevent overheating the tool and damaging its internal seals.
By working systematically from the edges and avoiding blank firing, you protect the breaker from costly internal shock damage. Ultimately, letting the hammer do the heavy fracturing ensures your demolition wraps up quickly without straining your machine's hydraulic system.
Grapple Attachment: Material Handling and Cleanup
For grabbing and moving awkward, heavy loads, nothing beats a hydraulic grapple attachment. It easily picks up and relocates highly irregular materials like logs, thick brush, demolition debris, boulders, and metal scrap, which a standard bucket simply cannot hold securely. This powerful, claw-like grip makes the grapple an absolute standout tool for disaster cleanup, land clearing, and site preparation. You should reach for this attachment whenever you are handling bulky, oddly shaped items that would otherwise spill out of a bucket. Wherever you need to clear messy job sites or load irregular material onto trailers, the grapple keeps your workflow moving safely.
To maintain your machine's balance and handle debris efficiently, keep these practical operator tips in mind:
- Center Your Load: Always position loose material in the middle of the jaws to ensure a balanced, secure grip before lifting it into the air.
- Don't Overstuff the Jaws: Grab realistic loads that the grapple can fully close around, rather than forcing the clamp over an oversized, unstable pile.
- Lift Low and Smoothly: Keep heavy or awkward loads low to the ground and close to the excavator's tracks to maintain optimal machine stability.
- Use It for Sorting: Take advantage of the open jaw design to shake out dirt and separate valuable, reusable materials from general waste during cleanup.
Using a grapple allows you to sort and load bulky waste far faster than any manual crew could ever manage. Ultimately, prioritizing balanced loads and keeping your cargo low to the ground ensures your site cleanup stays fast, organized, and perfectly safe.
Ripper Tooth: Hard Soil and Frozen Ground Breaking
Some ground is simply too tough for a standard bucket to dig, and that is exactly where the ripper tooth solves the problem. Featuring a single, heavy point, this attachment concentrates all of the excavator's hydraulic force onto one tiny surface area to pierce through heavily compacted soil, dense clay, frozen winter ground, and rocky terrain. By pre-fracturing and fracturing the stubborn surface, it loosens up the earth so your digging bucket can step in and finish the job with ease. You should reach for the ripper tooth first whenever the ground actively resists your bucket, using it to prep tough surfaces before trenching or major excavation begins.
To break up hard ground efficiently and avoid putting unnecessary stress on your excavator's arm, follow these proven operating tips:
- Rip in Shallow Passes: Make several shallow, progressive passes through the area rather than trying to tear through the full depth of the hard ground all at once.
- Use the Machine's Weight: Let the sharp ripper point and the excavator's natural hydraulic down-force do the heavy wedging work instead of jerking or slamming the arm.
- Work in a Grid Pattern: Rip your lines in clean, parallel tracks first, and then cross-rip perpendicular to those lines to fully shatter stubborn ground.
- Switch to the Bucket Promptly: Scoop away and clear the loosened soil immediately before it has a chance to settle back down or re-freeze in winter conditions.
Using a ripper tooth first saves your digging buckets from massive wear and tear and prevents your engine from lagging. Ultimately, taking the time to pre-fracture the ground in a grid pattern makes the actual digging phase incredibly fast and effortless.
Matching the Tool to the Task

Switching attachments to fit the particular task at hand is where a mini excavator's true strength lies. When you have the appropriate equipment on hand to switch them out, a single machine may complete a multi-stage project with complete ease. Once you are aware of each tool's strengths, selecting the ideal one for the job is simple. You should always reach for the bucket when moving loose soil or excavating trenches. It's time to install the hydraulic breaker when you encounter thick rock, asphalt, or solid concrete. For drilling repetitive, clean holes for posts or piers, you will want to use the auger drill. When you are stuck handling logs, bulky demolition debris, or messy scrap metal, grabbing the grapple is your best bet. Finally, if you are fighting heavily compacted clay or frozen winter ground, you should start by fracturing the surface with the ripper tooth before finishing the digging with your bucket.
A common mistake that many operators make is trying to force a single attachment through an entire job that it simply wasn't built to handle. Doing this slows down your project, wastes fuel, and puts dangerous stress on your equipment. What you should do instead is pause, swap out to the correct tool, and let the machine work efficiently exactly the way it was engineered to. The few minutes you spend changing attachments at the quick-coupler will pay you back many times over in increased speed, site safety, and drastically reduced mechanical wear.
When you take the time to build a small, dependable set of high-quality attachments and learn to use each one well, your mini excavator becomes much more than a simple ditch digger. It transforms into one of the most versatile, profitable, and valuable machines on any job site, capable of handling demolition, material handling, and site prep all on the same day.
Conclusion
Selecting and operating a suitable mini excavator attachment can make all the difference between a project that takes days to complete and one that goes smoothly. The hydraulic breaker smashes through concrete, the auger drills clean holes, the grapple removes irregular debris, the ripper tooth shatters earth too strong for anything else to penetrate, and the conventional bucket digs and trenches. Each specialized instrument has a clear, forceful purpose.
Your machine's capabilities are multiplied when you view your excavator as a multipurpose platform rather than relying on a single tool to perform everything. By taking a few minutes to change attachments, you may save gasoline, safeguard your crew, and protect your equipment. In the end, creating a trustworthy toolkit makes your little excavator the most useful and lucrative asset in your fleet.
Watch the Video
For a visual demonstration of mini excavator attachments in action, watch the video below to see how different tools improve productivity and expand the capabilities of your machine.
If you're looking to maximize the performance of your mini excavator, choosing the right attachment for every job is one of the smartest investments you can make. Whether you're digging, drilling, demolishing, clearing debris, or preparing difficult terrain, the proper attachment helps increase efficiency, reduce machine wear, and improve overall jobsite productivity.
Need help turning this research into a real quote request?
Send the machine category, intended use, or product name to the KUVUO team and we can help you take the next step.
Contact KUVUO